Menace to work with
Incredibly soft
Never behaves
Keep away from heat
You have to be patient!!!
I worked in a bank several years ago, and I remember a customer (an elderly gentlemen) who made a comment when referring to his account, "If isn't one thing then it's two." Well, I always reflect on that comment when working with Minky., if it isn't one thing then it's another. If Minky isn't stretching while you sew or cut, then it's curling or both. It is a misbehaved child that needs to tamed not tossed out and on to the next project.
Minky does require lots of patience, depending on your project, of course. If the project is as simple as, let's say, making a Christmas stocking, then you will be fine with just pinning...no need to worry about using a basting adhesive, a walking foot, or a double-sided tape.
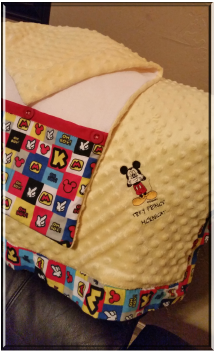
I have made several mistakes working with minky. I told my sister I would make a blanket for her son's (my nephew) newborn. I thought about what type of blanket I would like to make. I could have just taken the easy path and just sewn two pieces of fabric right sides together. I guess if I had done that, I would not be typing this.
In my search to find a different type of blanket, I found tutorials on how to make a" 10 minute" self-binding blanket. I thought, "Wow, 10 minutes. This is right up my alley." I was thinking I could have this done in no time, and if I could do one in 10 minutes, then maybe I could do a second one in 15 minutes (that would include cutting time.). Excited about this project and the idea of making a beautiful plush blanket for the baby, I rushed out to the nearest fabric store to purchase minky and flannel for my 10 minute project.
Well, this 10 min project was extended due to certain circumstances such as, not cutting, measuring, or basting properly. You see, I could have done this project in about 15 minutes if the fabrics used were flannel or cotton but not minky.
Incredibly soft
Never behaves
Keep away from heat
You have to be patient!!!
I worked in a bank several years ago, and I remember a customer (an elderly gentlemen) who made a comment when referring to his account, "If isn't one thing then it's two." Well, I always reflect on that comment when working with Minky., if it isn't one thing then it's another. If Minky isn't stretching while you sew or cut, then it's curling or both. It is a misbehaved child that needs to tamed not tossed out and on to the next project.
Minky does require lots of patience, depending on your project, of course. If the project is as simple as, let's say, making a Christmas stocking, then you will be fine with just pinning...no need to worry about using a basting adhesive, a walking foot, or a double-sided tape.
I have made several mistakes working with minky. I told my sister I would make a blanket for her son's (my nephew) newborn. I thought about what type of blanket I would like to make. I could have just taken the easy path and just sewn two pieces of fabric right sides together. I guess if I had done that, I would not be typing this.
In my search to find a different type of blanket, I found tutorials on how to make a" 10 minute" self-binding blanket. I thought, "Wow, 10 minutes. This is right up my alley." I was thinking I could have this done in no time, and if I could do one in 10 minutes, then maybe I could do a second one in 15 minutes (that would include cutting time.). Excited about this project and the idea of making a beautiful plush blanket for the baby, I rushed out to the nearest fabric store to purchase minky and flannel for my 10 minute project.
Well, this 10 min project was extended due to certain circumstances such as, not cutting, measuring, or basting properly. You see, I could have done this project in about 15 minutes if the fabrics used were flannel or cotton but not minky.
Cutting Minky
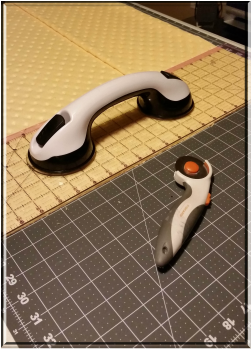
1. You will want to place your minky fabric wrong side facing up. The wrong side is smooth with no pile, and you can see how straight your cut will be.
2. Use a rotary cutter. I like cutting minky with a rotary cutter because you get a nice clean and even cut.
1. You will want to place your minky fabric wrong side facing up. The wrong side is smooth with no pile, and you can see how straight your cut will be.
2. Use a rotary cutter. I like cutting minky with a rotary cutter because you get a nice clean and even cut.
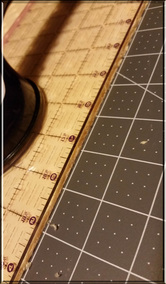
Measuring Minky
1. Place minky wrong side face up. The right side has too much pile even it is a short pile.
2. Gently spread your minky fabric with both hands, and smooth out the fabric.
3. Make sure you measure EXACTLY the amount you need and no more.
There are several methods you can use to help keep your minky in place
|
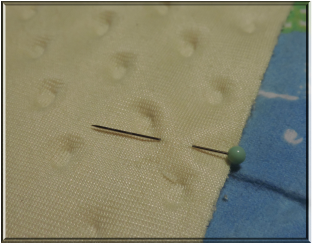
Basting Methods for Minky
1. The pin method. You will need to use lots of pins to try and keep it from stretching. I have read that you should pin 1 1/2 inches apart. From experience, I have pin about 1 inch apart. It's okay if you lots of pins, you will just have slow your sewing down a bit. 2. You can use basting spray. If you use this method, just make sure you are in a well ventilated area. 3. Use double sided tape ( such as Wonder Tape) and pins to hold your minky in place. |
|
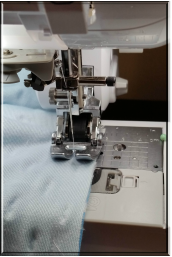
Sewing Minky
1. With right sides together, place your fabric so that you are sewing on the other fabric, not the minky. If you are doing a self facing blanket, you will sew on the minky side. 2. If you have selected the pin method, be prepared to take it slowly because you have several pins to remove as you sew. Do not sew over pins 3. Because Minky stretches, use a stretch needle. 4. Try using a walking foot. But you might still need to use a basting spray or pins because the minky will still stretch. |
|
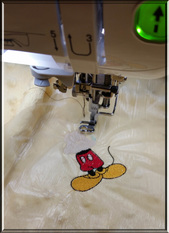
Embroidering on minky
1.Choose a medium or heavy weight design. Open designs will get lost in the pile.
2. If you select a font, make sure it is wide or thick. I used a thin font and it was barely noticeable.
3. in addition to your bottom stabilizer, hoop a water soluble stabilizer on top of the minky, so your design doesn't "sink" in the minky.
