How To Print Clothing Labels Using Photo Fabric
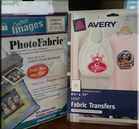
After you have designed your labels, you will print them using an inkjet printer. You can use either photo fabric paper, iron-on transfer paper, or your own fabric that will fit into the printer. In this tutorial, I will show you how to print your labels using photo fabric and iron-on transfer paper. Below is a list of what you will need.
- An inkjet printer
- photo fabric paper and or
- iron-on transfer paper
- fabric softner ( I use Downy)
- Bubble Jet Set or Rinse (if using your own fabric) purchased online
- Parchment paper- found in your local grocery store
Using Purchased PhotoFabric
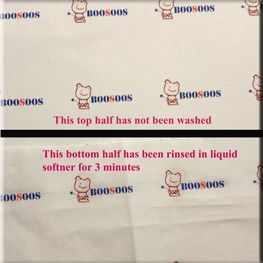
Open the design that you created on your computer. The design on the right is the one we created in Part I of label making.There is no need to flip the design horizontally. Paper placement in inkjet printers varies, so test on a blank sheet of paper to determine placement. Photo fabric (I use Crafter's Images) is cloth on one side and an adhesive paper on the other. The cloth side is what you will print on. Select "print" You now have a sheet of labels. Your labels are not ready just yet! You will need to let the ink dry. I let mine dry for about and hour. You want to make sure the ink stays on your fabric and doesn't fade after a couple of washes. After the ink has dried, you will want to rinse your sheet, to prevent the ink from bleeding. Peel away the cloth from the adhesive and place cloth in cool water with a capful of fabric softner for about 2-3 minutes and then rinse again with water for 30 seconds. Let it dry on a towel. |

|
Using Your Own Fabric To Make Labels
What I like most about using my own fabric is I get to choose whatever color I want. You will need to prepare your fabric before printing on it. You can see below the result of not preparing vs preparing your fabric.
What I like most about using my own fabric is I get to choose whatever color I want. You will need to prepare your fabric before printing on it. You can see below the result of not preparing vs preparing your fabric.
- I put about 12 capfuls of Bubble jet Rinse in a small bowl and placed two sheets in the mixture for about 5 minutes
- I rinsed in cool water and let it air dry or you can throw in the dryer
- Iron your sheet
- I sprayed the back of the fabric sheet with an adhesive. Some people will use freezer paper, it was too thin for my printer.
- Place the sheet you just sprayed on an 8 1/2 x 11 sheet of printing paper and let it dry (at least 30 min) before placing in the printer. Make sure there are no strays along the edges
- Print on your inkjet printer
- Let it dry
- Remove from the paper and place in the fabric softner or the Bubble Jet Rinse and then rinse with cold water
- Let it air dry or throw in dryer
- Iron over the sheet with the parchment paper
|
The Fade Results Are In!
These are results for the Crafter's Images photofabric sheets. The million dollar question is...how will these labels perform after several washes? I put the sheet to the right through several washes. . The top half is the control sheet. Sorry for the dark picture. Although the pictures are dark, you can see that there is really no change in the ink or dye. |
|
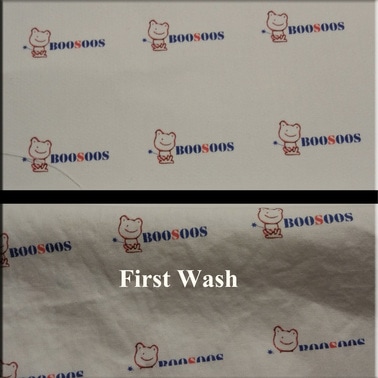
This is the first wash Result. The to half is the control sheet and has not been washed. Sorry for the dark pic, but there is no fading.
|
.
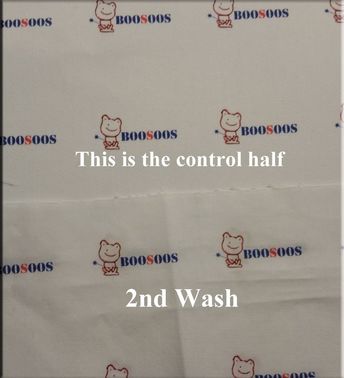
This is the second wash and still no fading
|
