How To Sew A Bodice lining | Sewing Tutorial
In this tutorial, I will show you how to line a button-down bodice. The pattern is Simpliciyt 8304.
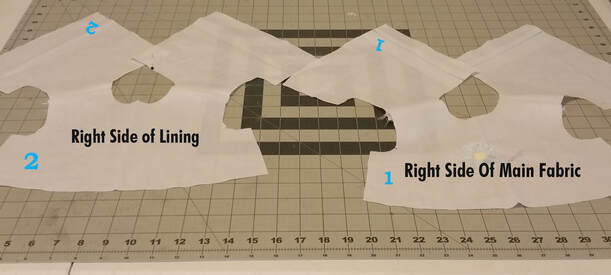
The first step is to cut out your pieces. You will cut your lining using the same pieces as your fashion (main) fabric.
The main fabric is labeled as 1 and the lining is labeled as 2.
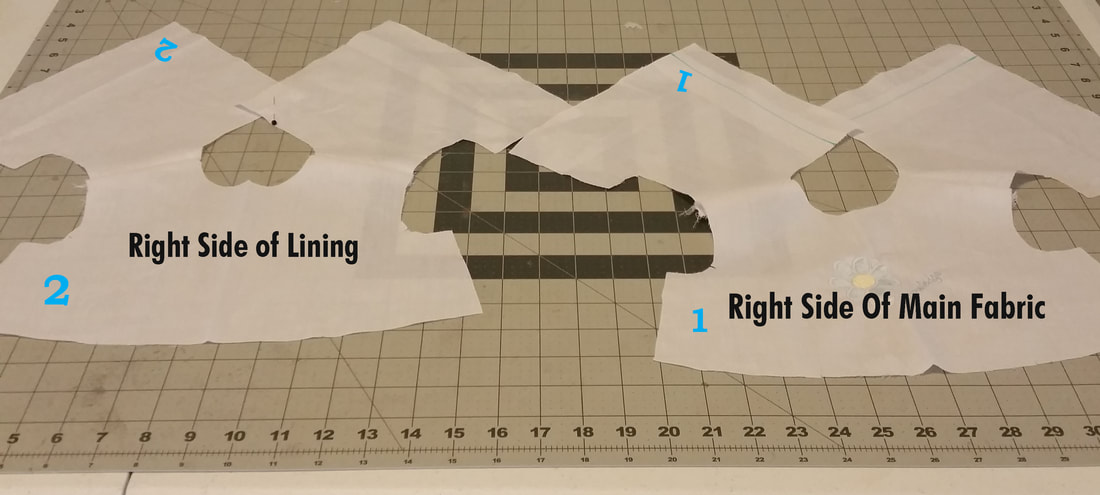
The first step is to cut out your pieces. You will cut your lining using the same pieces as your fashion (main) fabric.
The main fabric is labeled as 1 and the lining is labeled as 2.
|
Step 1
Cut your Pieces |
|
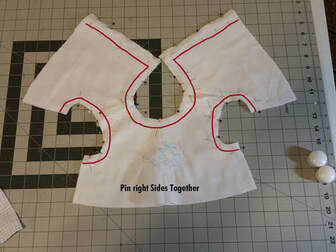
Step 2 - Place Right side of lining and right side of Main fabric together and pin along the back, neckline, and armholes as shown in picture below. You will sew along the back for the buttonholes and buttons.
|
Step 2
Pin along back, neckline and Arm holes |
|

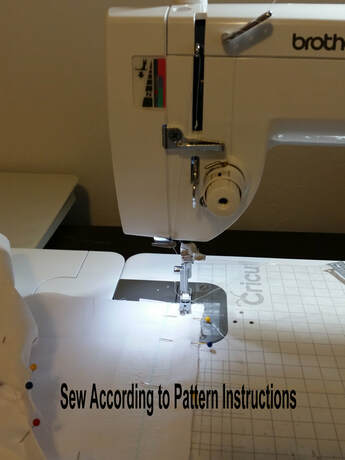
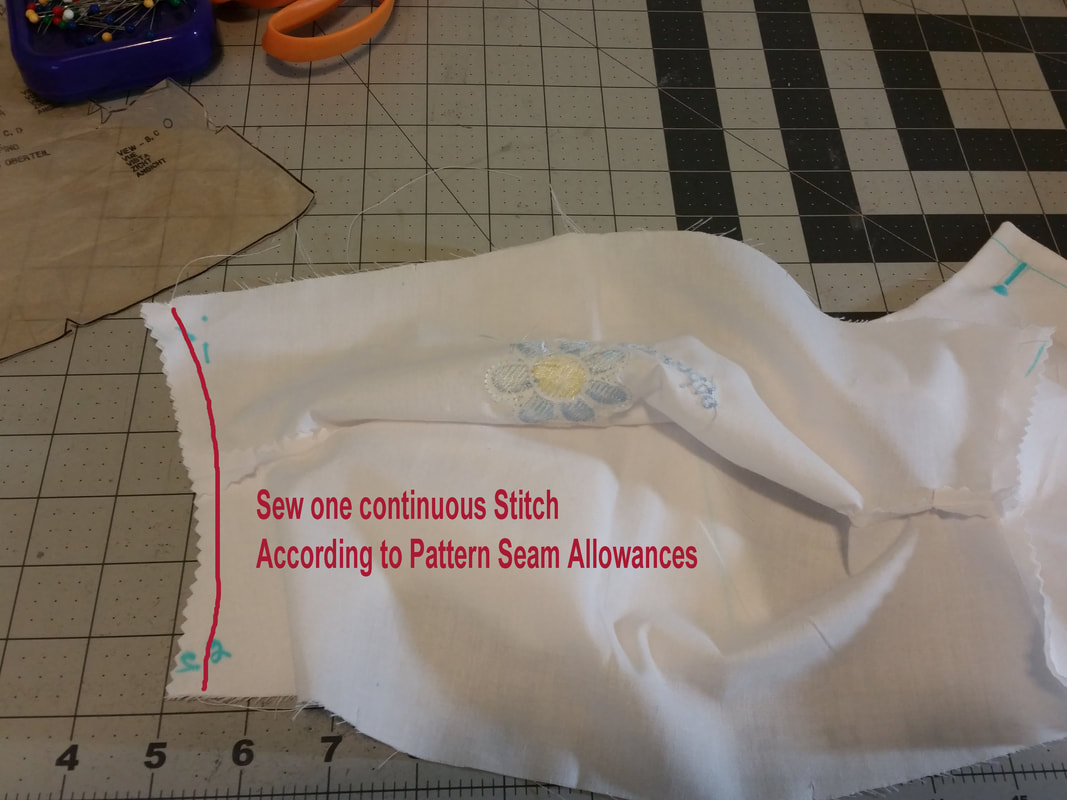
Step 3 - Sew According to the pattern instructions. The seam allowance for the neckline using this pattern is 3/8 of an inch. I sewed a 5/8" seam along the back and armholes. Note: You can also reinforce along the armhole
|
Step 3 - Sew according to the pattern instructions
|
|
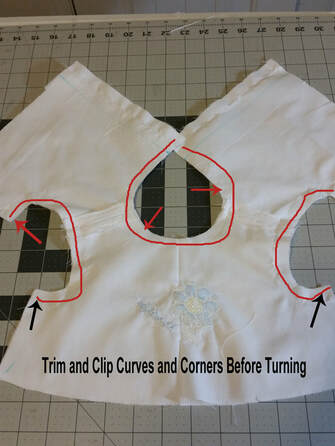
Step 4 - Clip and Trim Curves and Corners before Turning. This step is important because you will want to eliminate bunching and bulk.
|
Step 4 - Clip and Trim Curves and Corners before Turning
|
|

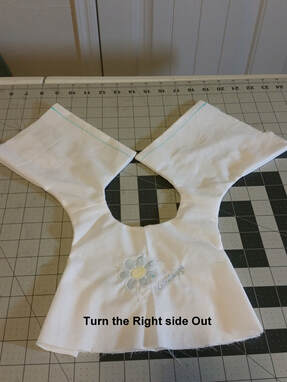
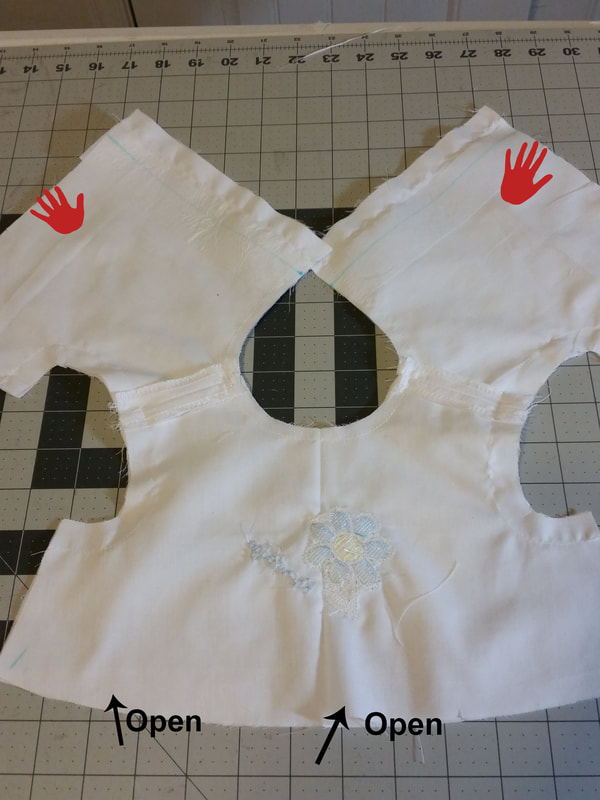
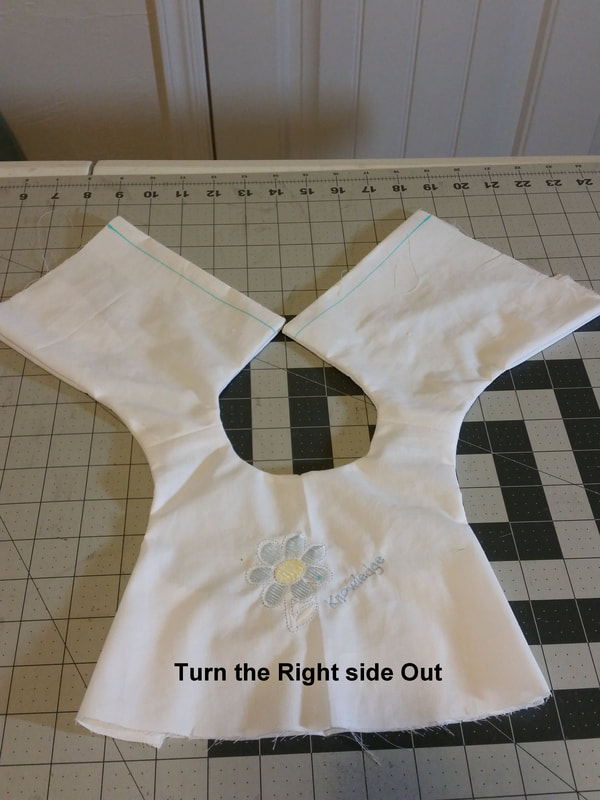
Step 5 - You are almost finished!! You will turn the right side out. All you have to do is open the bottom of the bodice, put your hand throgh the bodice and pull the opposite end (the back) through. You will do this for each side.
|
Step 5 Turn the Right Side Out
|

|
|
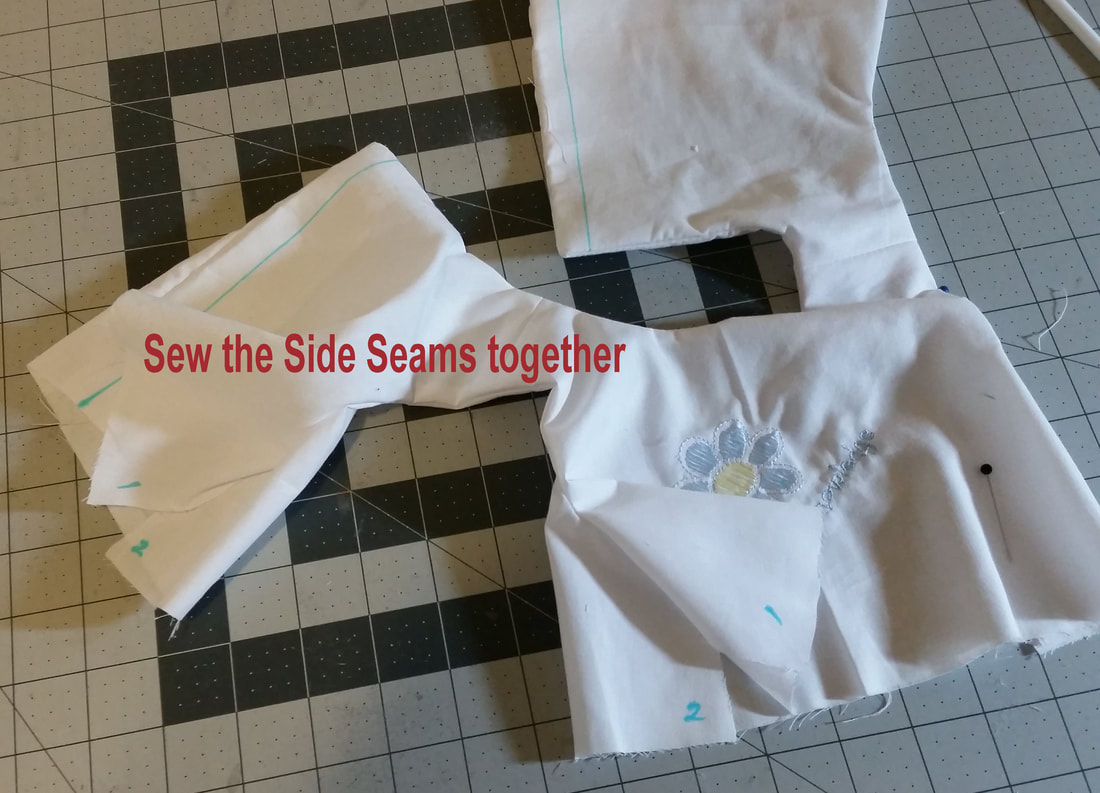
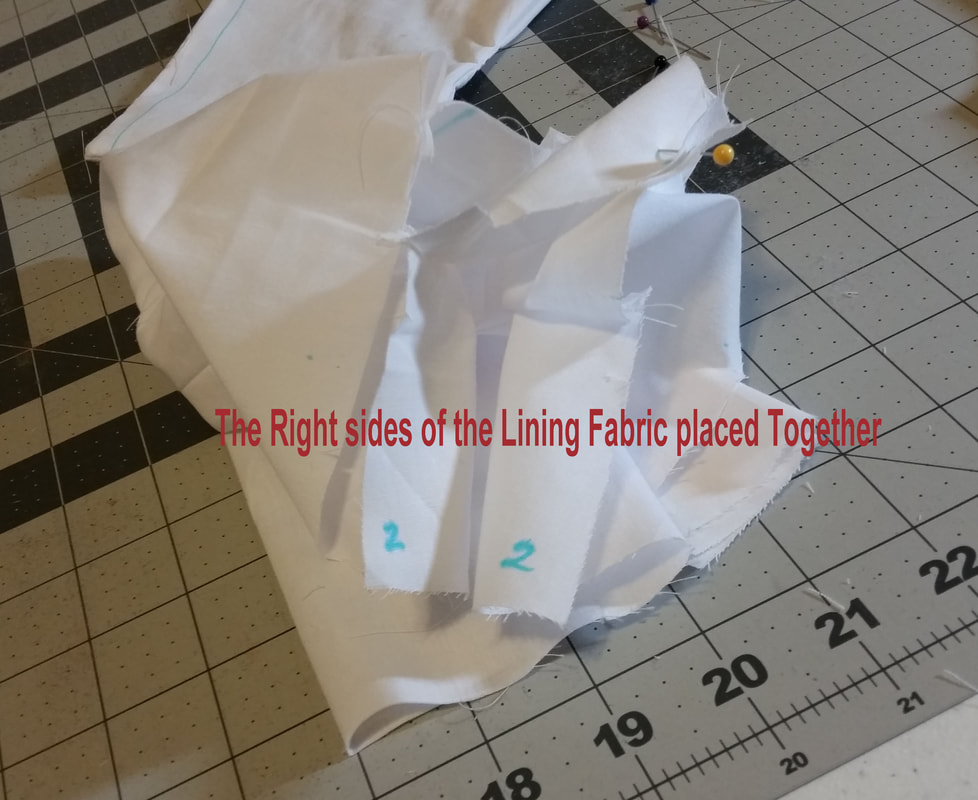
Step 6 - Sew the Side Seams Together. This step is right sides of main fabric together and right sides of lining together. The main fabric is marked 1 and the lining is marked 2. Place the matching numbers together as shown in the picture below. Sew across the seam. The last Picture below shows the side seam sewn.
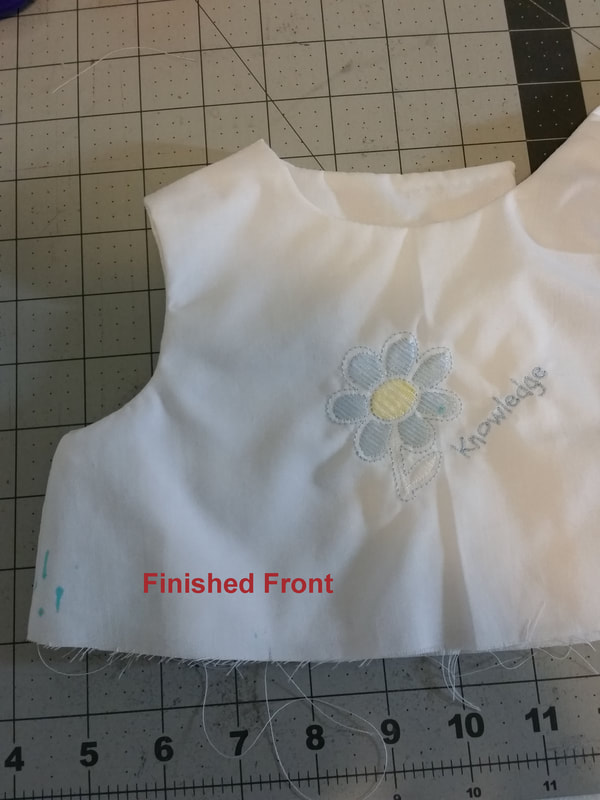
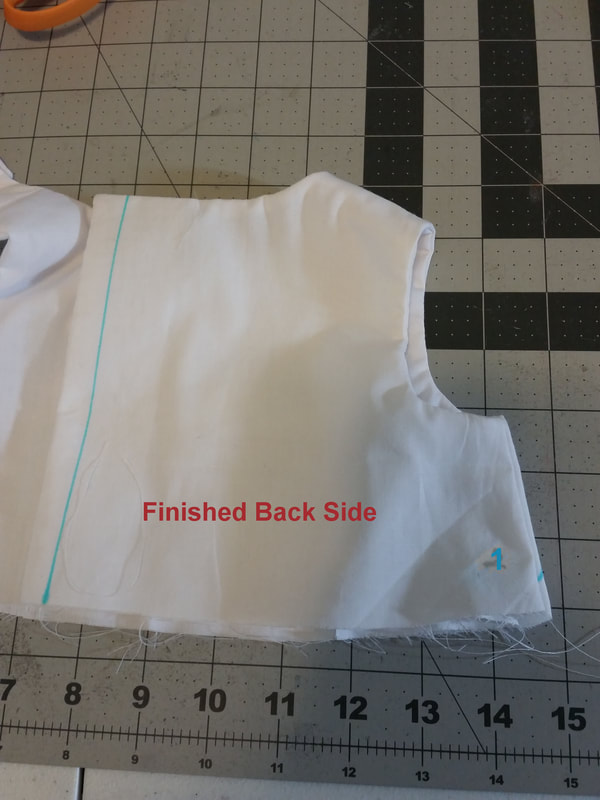
You are Finished! The pics below show you what the completed bodice should look like.